
If you’re in need of human body systems activities, here’s a fun and easy way to make a model of the respiratory system that combines both science and art!
Materials needed:
- White cardstock paper
- pencils, crayons, and/or markers
- shaving cream
- liquid Elmer’s glue
- red paint
- flexible drinking straw
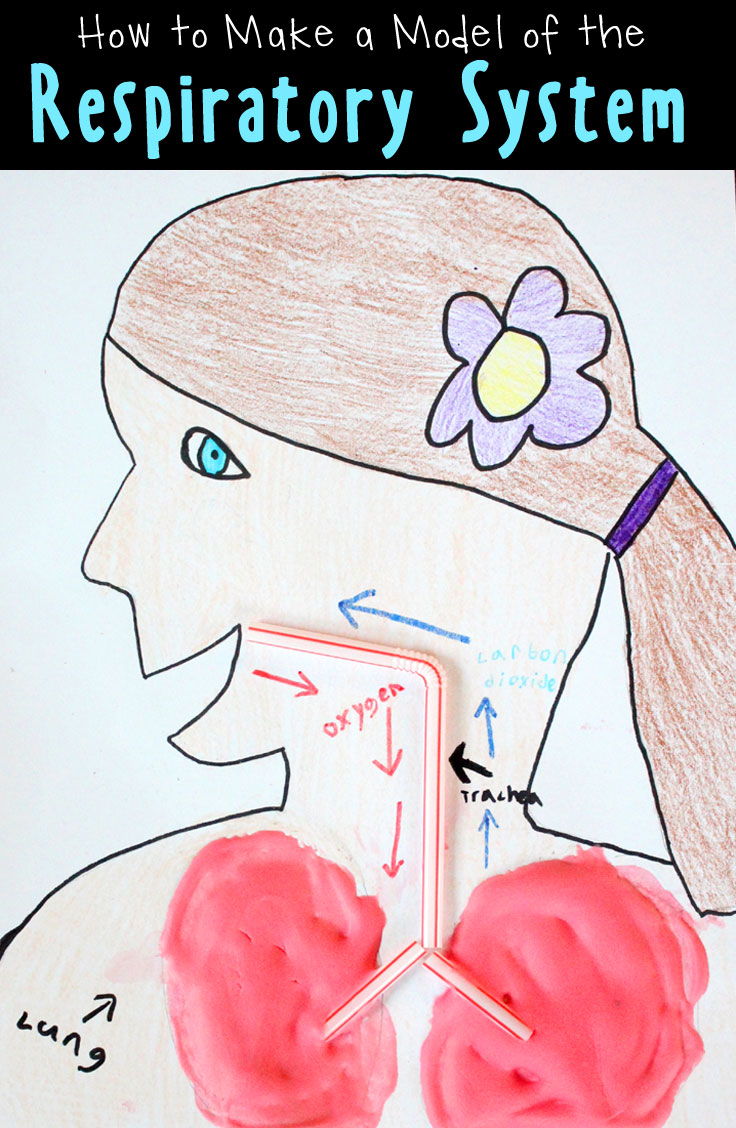
- Have your students draw and color a side profile of themselves. If students need help with the shape of the profile, you can tape a sheet of paper on the wall and have them stand in front of it sideways. Have someone shine a flashlight at them, casting a shadow of their profile on the paper, and simply trace around it. Then they can fill in the details of the profile themselves.
- Next, create puffy paint by mixing equal parts shaving cream and liquid Elmer’s glue. Add a few drops of red paint and stir it in to create the pink color. Use the puffy paint to create the lungs.
- Then, use a flexible straw to make the trachea and glue onto the picture. We cut ours to shorten it and then used the piece we cut off to add the smaller branches into the lungs.
- Finally, students can label the lungs and trachea. We also drew arrows to show the path the air takes when entering and leaving our body. We used a red arrow to represent the oxygen rich air we breathe in, and blue arrows to represent the carbon dioxide rich air we breathe out.
If you’re in need of other human body systems activities and resources, check out my Human Body Activities for Kids Pinterest Board or hop on over to this post of 20 Human Body Books for Kids.
4 Comments